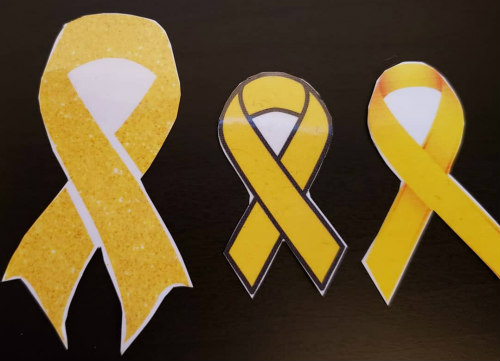
Back in September 2018, I made some temporary tattoos for an event my daughter’s dance studio was attending. I posted some pictures of them on my Instagram and some people asked me how I made them. It’s not nearly as difficult as one would think. So here is a quick walk-through on how to make your own temporary tattoos.
Supplies needed:
Temporary Tattoo Paper
Inkjet printer
Scissors or paper cutting machine (like a Cricut or Silhouette)
The temporary tattoo paper I use is from Silhouette. Not only does Silhouette have cutting machines, they also have a stamp making machine, a 3D printer, and a ton of crafting supplies (like colored vinyl, heat transfers for fabrics, and glass etching, to name a few). I will admit that the temporary tattoo paper is a little on the expensive side. It is $10 for 2 sheets. However, you can get a lot of use out each sheet, depending on how large your designs are. If you don’t want to buy the paper online, it is also available in-store at many Joann Fabric locations.
Create your design in your preferred software. For the yellow ribbons, I downloaded a few designs from various graphics websites and lined them all up in a Word document. If you are creating your own design, you could do it in Photoshop. Silhouette also has a design studio where you can purchase designs from artists for your use. (I think Cricut is similar but I only own a Silhouette machine so that is what I am most familiar with.) If you are using a design with text or numbers, make sure you flip the design before you print it. Otherwise, your text will come out backwards when you apply the tattoo to skin.
Once you have your design ready, you want to print it onto the tattoo paper. (Again, don’t forget to flip any designs with text or numbers or if you want your design to face a specific way!) When you load the tattoo paper into your printer, make sure that the sticky side is the side getting printed on. My printer prints on the ‘bottom’ side of the paper in the feeder so I would put the tattoo paper in with the sticky side down. After your design has printed, set the paper aside for a bit to let the ink dry.
Now comes the difficult part. The clear adhesive sheet needs to be applied to the sticky side of the tattoo paper. Most likely, you won’t get the right on the first try. And that is OK. It took me a few tries before I found a technique that works for me.
At the top of the adhesive sheet is a small peel-off strip. Just peel that part off. This will attach to the top of the sticky side of your tattoo paper. Try to get the two pages to line up as straight as possible. Once that little adhesive strip is attached to your tattoo paper, carefully peel off the rest of the paper on the adhesive sheet. Slowly press the adhesive sheet onto the tattoo paper. As you press the adhesive sheet down, try to keep even pressure on the whole page. The goal is to have no air bubbles on any of the designs. (It doesn’t matter if there are air bubbles on the parts of the paper without the design. We’re going to cut that off anyway.)
When the entire adhesive sheet is attached to the tattoo paper, you can move onto cutting out your designs. If you have a cutting machine, you can follow the directions on your specific machine so it knows where to cut. Personally, I just cut my designs out with scissors. Whichever method you use, try to cut as closely to the edges of the design as possible. The least amount of “white space” on the finished tattoo, the better.
And that’s it! All you need to do now is apply the temporary tattoo. While I have only ever applied temporary tattoos to skin, I have read that some people apply them to woodworking pieces then cover it with a clear coat. Both applications would work the same - peel off the clear adhesive sheet from the design. Place the design on your skin/wood sticky side down. Take a damp cloth and wet the back of the paper. Slowly peel the paper from the design. There is your temporary tattoo.
As a warning, any clear spaces on the design that aren’t cut out can be a little sticky for a bit. Make sure your tattoo is completely dry before doing anything where it would pick up dirt. The tattoo will wash over after a couple of days or you can remove it faster with some rubbing alcohol. It’s a great way to show some team spirit without a ton of work.
Good luck!


